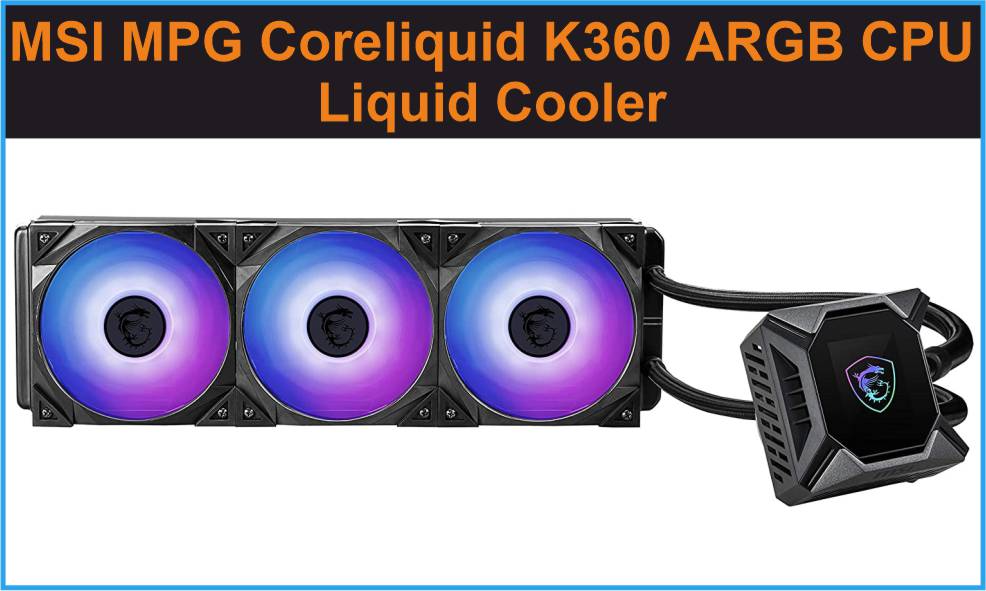
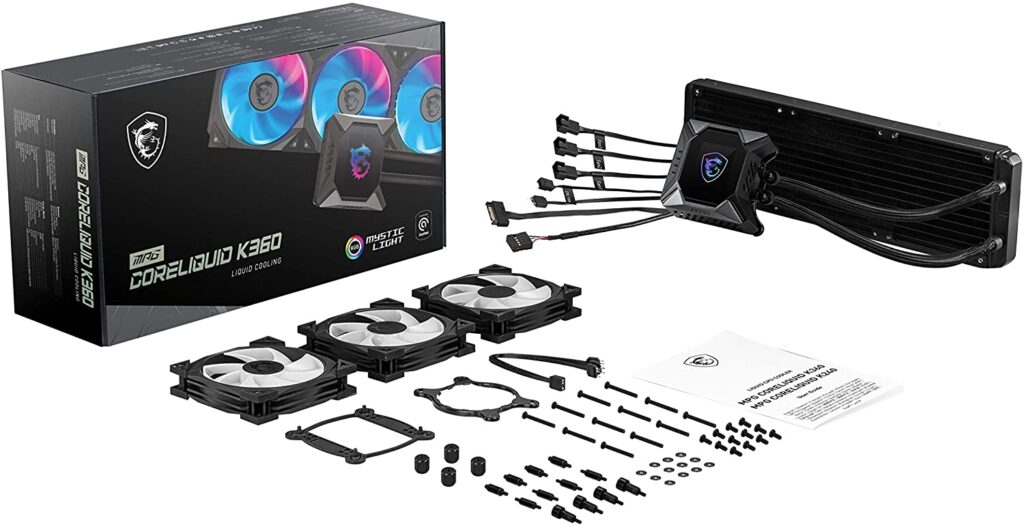
So it has been a while since MSI has started making all in one liquid coolers, and their models have been quite good for the price, and now they have a model that has a screen on it, and they call it MSI MPG CoreLiquid K360. Hey guys, I am Siddharth, and let’s check out how good this is. In the box, you get the manuals, the tools that you will need to mount this, 3 of the MSI’s Torx 4.0 fans which look pretty cool, and you, of course, get the cooler itself, which has Asetek’s 7th generation Pump, so it should perform well with its 360-millimetre radiator which is 27 millimetres thick. The tubes on this cooler are also very flexible, so they should be easy to mount. The water block is covered by this plastic cover which is easily removable, and under it, you can see the LCD screen, along with the 60-millimetre fan this cooler has for cooling your motherboards VRMs.
Now, This complete module on the water block also has wires for connecting the fans so their RPM can be monitored and controlled, and it also has the RGB header which will control the fans’ RGB after you connect the included ARGB splitter to it. This means that there are many wires that stick out of the water block on this cooler, but that is how it has to be for all the features it has. The bracket for Intel and AMD can be changed easily, and now let’s get to the installation, which is pretty easy because of how you don’t need to hold the backplate for mounting this cooler on your motherboard. The thermal paste on this cooler comes pre-applied, but you should not use the pre-applied thermal paste on coolers, so we’re using corsairs TM30 thermal paste, which is quite cheap.
Do note that even though we’re mounting the water block in this orientation, you can have the tubes coming out of any direction from the block because you can actually select the orientation of the screen later on in the software so that it is upright, which is an essential feature to have which some other coolers don’t have. Then you have to just connect the fans and their ARGB to the cooler, but you can also directly connect them to your motherboard’s ARGB header and fan header if you want to control them directly with your motherboard. There’s also a USB header that you have to connect to your motherboard to control this, so make sure that you have a spare header there. And with all of that done, let’s check out how the cooler looks like, and I have to say that I am very impressed by how good this looks.
The big rectangular cover of the water block looks really nice and chunky without overdoing the aggressive look, and it even matches the theme color and theme on my Asus motherboard really well. There are a lot of wires sticking out, and I am not sure how these can be dealt with, but this is again how it has to be. The fans also look very good, they do have a unique design that looks nice, and the plastic that connects the fins to each other also creates a ring of RGB when these fans spin, which adds to their look. The RGB can be controlled easily by the software, and even though I am not impressed with some of these effects, the basic effects like breathing and rainbow color are done right, but personally, I would just connect these fans to my motherboard’s ARGB header, but this is also good to have it you don’t have a free one on your system.
Another unique feature that the fan controller on the water block allows is GI cooling, which stops one or two of the fans on the radiator when the temperature is low enough for it to not need all three of its fans. I really liked this feature as I am a fan of efficiency. Also, make sure that you’re subscribed to the channel so you don’t miss out on future videos. The water block has a 2.4 inch LCD screen which you can customize in many ways. You can set it to monitoring different stats of your system like CPU temperature, clock speed, and RPM of the fans. You can set images on this display, but it only supports 240×320 bitmap images which you will have to create manually by using software like Paint or GIMP, so this will be a little difficult for people to do. The animated effects available are quite limited and they are quite bad, and you can’t upload your own GIFs to the screen, which is a feature that the competition has.
Coming to the quality of the screen, I have to say that it is not that good because the contrast ratio on this screen is bad, and so are the viewing angles and the colors, and you can see how the black background on it looks like a very bright grey. You can kind of control this problem by reducing the brightness but that also reduces the brightness of things you want to see on the screen. The problem is further worsened by the style of display that MSI has chosen here, as the numbers on the monitoring screen have a stylized digital background that makes the numbers on the screen unnecessarily difficult to read due to low contrast ratio, and I really hope that MSI can fix this with a firmware update. From certain angles, it looks better, but that is just because the viewing angles are not good. Images uploaded on the screen also don’t look great because the screen lacks saturation and contrast. One thing you can do is use simple logos or vectors which do manage to look decent enough.
You can have text displayed with marquee effect and can also have it displayed over an image of your choice, but there is no customization for the style or speed of the text. Now even the screens on the competition aren’t perfect, and they can also lack contrast due to their LCD panels, but the screen on this cooler really stands out as being poor compared to the rest of its quality. Still, if you have the RGB on in your case, it doesn’t look bad, and over time you would get over its quality and focus on the information that it is showing. But switching to good news, the performance of the MSI MPG CoreLiquid K360 is pretty good, as with a 30 minute AIDA64 Stress test on my Core i99900K which loads it to a 140 watts of power draw, the MSI MPG CoreLiquid K360 was able to keep it at an average of 76 degrees with the ambient temperature being 31 celsius. The fans on the radiator ran at 70% or 1700RPM for a reasonable noise level on load.
On 100% the fans do make a lot of noise, but that is to be expected with 2500 RPM fans, and at 70%, the noise is quite well controlled for the performance you get. This is pretty similar to other 360mm radiator coolers that I’ve tested, but that is not surprising as most of these coolers are made by Asetek. But the MSI cooler does have an additional fan mounted in the water block, and this fan actually makes a difference, as with a 15minute stress test load, the fan was able to keep the temperature of my motherboardsVRM Heatsink 4.5 degree celsius cooler at 100% compared to running it at 20%, so the difference would be even greater if you compare it with a cooler that does not have an extra fan for VRM cooling. Now, most of the high-end motherboards these days have really overkill VRMs, so lower temperatures may not really matter, but if you have a high core count CPU that needs a lot of power, and you’re also overclocking it, then it definitely doesn’t hurt to have your VRMs at a considerably lower temperature.
So overall, the MSI MPG CoreLiquid K360 is a pretty good cooler. The installation is simple, the features are great, the performance is on point, and the additional VRM cooling fan does actually make a difference. The major downside for this cooler is the quality of the display that it has, and since the screen is the main reason you would get this cooler for, I am a little disappointed here, but it does work how it’s supposed to so I don’t consider it to be a deal-breaker.
At a price of 290 US Dollars, this is definitely undercutting its competitors for a similar product, and it also has nice RGB fans and a VRM cooling fan which the competition doesn’t have. So with all that in mind, it is a product that I can recommend, as it is a very feature-rich cooler that is easy to use, and it also performs well.
Read More:
TOP 3 BEST LENOVO LEGION GAMING LAPTOP | LEGION 5 PRO
THE 3 BEST GAMING HEADSETS FOR PS5 (2021)
BEST MICROPHONE FOR GAMING & STREAMING IN 2021
BUDGET WIRELESS CONTROLLER FOR PS4 AND PC
So this concludes the topic for MSI MPG Coreliquid K360. That’s about it for me, I forgot to tell you something, If you’re enjoying this article, please make sure to share the article. If you have any questions, comment down below, and I’ll try my best to answer them.


